Strawberry Cucumber Salad

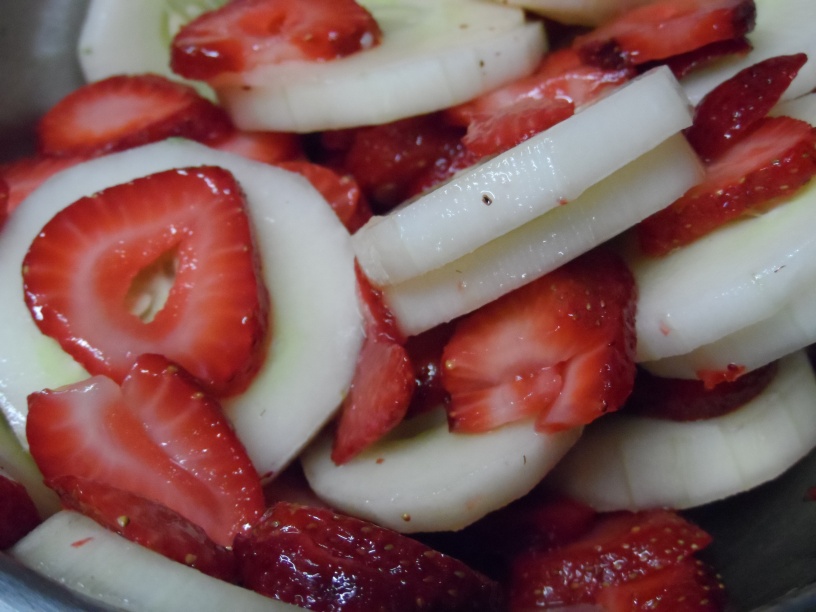
Strawberry Cucumber Salad tossed in Honey & White Wine Vinegar

Have you heard? I can grow a badass cucumber! It all started in the compost

…I’m one of those people who will see something in a picture and more often than not, convince myself  “Hey, I can do that!”, and off I set to do ‘whatever‘ without really researching the ‘how to’ behind the project… Sound familiar? Know anyone else like this? Well in this instance, it was composting. I mean seriously, how hard can it be to allow stuff to decompose, Right?  So I built a box out of pallet leftovers setting a drum from an old washing machine in the center to hold my ‘stuff’. cucumbers
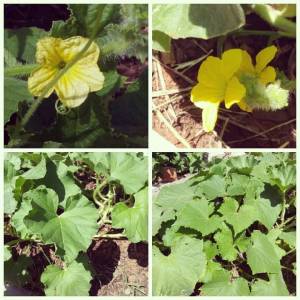
Making sure the cover would lock to keep critters out, ensuring airflow ~ I felt good about my recycling endeavor and started filling the drum with kitchen scraps & garden trimmings, turning it daily as I had interpreted from the pic. Payday happened at the beginning of Spring 2018 when my efforts were rewarded with beautiful black rich soil! WHOOT! I was so excited at my success! 🙂 As soon as it was warm enough that black gold was spread over every single raised bed, used in all my pots and even layered in some ground areas. Anticipation grew as I soon started seeing little sprouts everywhere. Yay! I was all happy with myself; maybe I do have a green thumb… HaHaHa, If Only! Ya see, all the sprouts were IDENTICAL. Every pot. Every bed. Every spot I used my black gold had the exact same sprout. 

Each sprout I have since learned was a cucumber plant! (a few were cantaloupes)

Apparently, I need to research more about composting because when I discarded my cucumber vines with some cucumbers last year, the seeds did not decomp as I expected and were dispersed throughout my entire garden this year! SMH! Imagine my surprise when cucumbers started coming up where I had planted corn! And cantaloupe! And tomatoes in my potatoes! WTH? It’s funny now but I’ve had to do some serious searching for cucumber inspired recipes…

Thus, bringing this ingenious lovely into my life! Simple, easy, 4 ingredients! Think of it as ‘Summer in a Side’!SAM_0429

Ingredients:

  • 1/2 cup Honey
  • 1/8 – 1/4 cup White Wine Vinegar
  • 1 large Cucumber
  • 1 pint Strawberries

Mix vinegar & honey in a small bowl. I suggest this motto: “Less is Best, Taste as you Go” to ensure the vinegar isn’t overpowering the sweetness I started with 1/8 cup and continued until it fancied my flavor! 😉

Peel and slice your cucumber into rounds

Slice the strawberries after washing and removing stems, adding to bowl of cucumbers. Pour the honey mixture over the fruits, tossing gently to dress each slice. Cover and chill before serving.SAM_0431


SAM_0433


Oh, food for thought: to cut small fruits like strawberries, olives, or mushrooms I ♥ this ~ Works Perfectly so hands of grands can assist without concern of cutting themselves!

Surfing through Pinterest as I usually do for inspiration I stumbled across a pin that led me to Karen over at   https://thefoodcharlatan.com with her re-make from the cookbook Our Sweet Basil Kitchen by Oh Sweet Basil. Both recipe curators use balsamic for this dish. I chose white wine vinegar as it has less bite IMO compared to balsamic versions. But don’t take just my word, you should try all three for yourself!

Til Next Time ~

Domesticate Rebellion

THRIVING ~ Have you witnessed the testimonies? It’s not about weight loss; it IS about feeling better from the inside out! If interested I would love to help you! Knowledge is Power! Sign-up for a FREE account & information at https://domesticated.le-vel.com

DISCLAIMER: This post may contain affiliate links meaning if you click & buy, I may be compensated. So, Thank you!

CRUNCHY ZUCCHINI BITES

Crunchy Zucchini Bites

Have you noticed summer is here? I assure you it is peaking in my neck of the woods.  Bringing record-breaking, scorching, hell-like heat with it too! WOW! Sadly, for many of my garden edibles the heat has been nothing less than brutal. The increased temps left me just a single zucchini ready for picking this morning. Hmph! Nature can be a beast sometimes. 😦

However, being the single beauty was of good size I decided I wanted to stretch it between the hubs & I as a side.

And I Did! Just look at these crispy bites of yum! Here is how I did it:  SAM_0407

  • 1 zucchini
  • 1 cup vegetable oil
  • 1 1/2 tsp garlic powder
  • 1 cup panko bread crumbs
  •  2 eggs, beaten
  • 1 cup all-purpose flour
  • 1/2 cup grated Parmesan cheese
  • salt/pepper to taste
  1. Peel zucchini then cut into 1/8″ rounds
  2. Grate 1/2 cup parmesan cheese into the Panko, add garlic powder & mix well
  3. Beat 2 eggs
  4. In a fry pan, heat some oil to medium – high
  5. Dredge the rounds in your flour
  6. dip thoroughly in egg
  7. press into the panko parm breading mix being sure to cover each side
  8. Fry in batches about 2-3 minutes each side until the centers are soft and the outside is crispy, crunchy golden brown .
  9. Remove from oil, place on paper towel salting to taste

SAM_0415
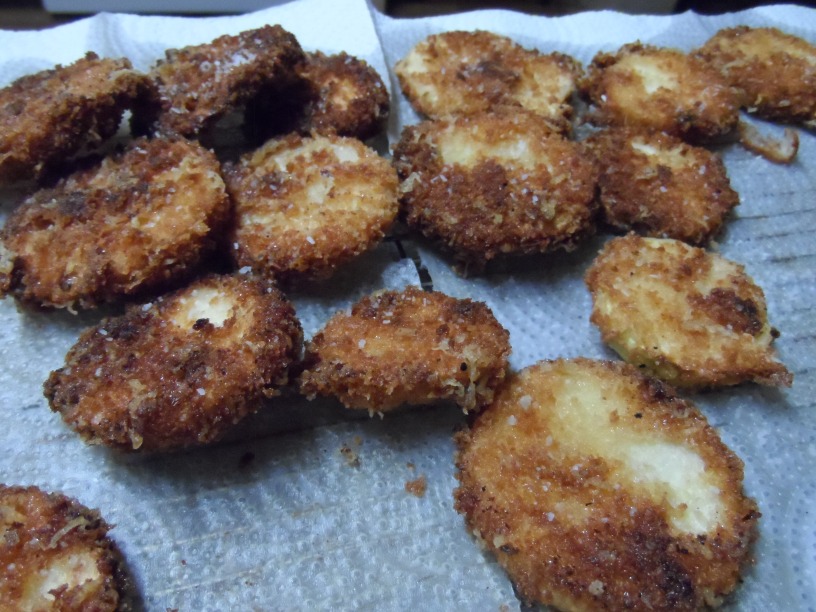
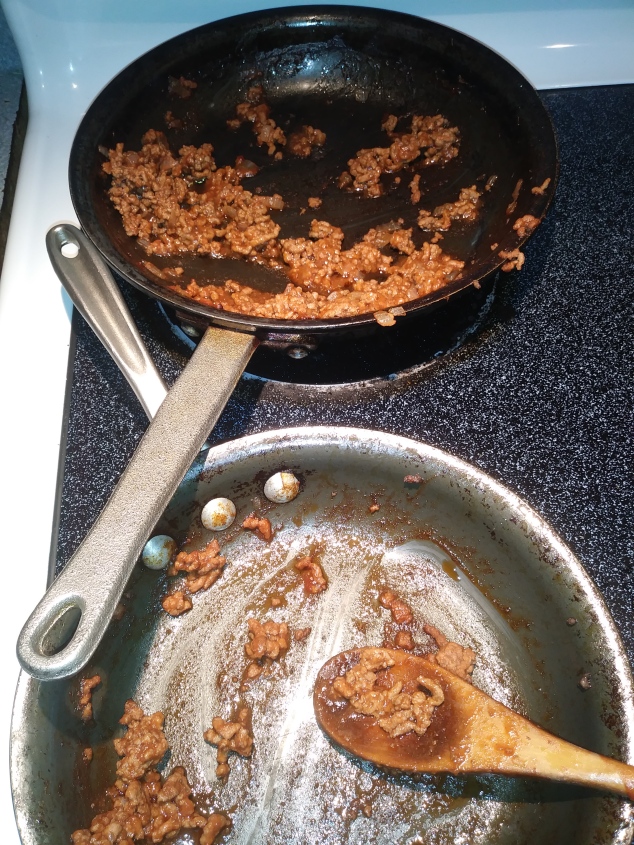
These lovelies were paired with grilled chicken, fluffy potato and out of this world crunchy zucchini bites! If you’re a texture person as I am, then you will enjoy the crispy crunch ~ A total knock out thanks to the Panko (Japanese bread crumbs).

Another “Thank you” to Chungah over at #DamnDelicious for her recipe inspiration!SAM_0439

During all seasons we get to enjoy grilling thanks to my counter-top grill. Electric, removable grate & removable drip pan. ♥♥♥

Such an effective way to 71tRQFahuML._SL1500_
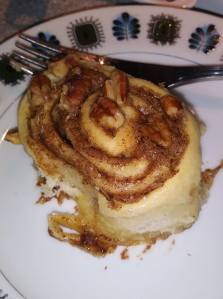
bring the flavors & textures of outdoors inside without feeling the heat!

If you enjoy grilling as much as I do, but don’t want to melt in the rising temperatures outside, here is a newer version counter-top grill by Hamilton Beach   https://amzn.to/2LuVlpFd. 

Time to get your grill on!

Til Next Time ~

Domesticate Rebellion

THRIVING ~ Have you witnessed the testimonies? It’s not about weight loss; it IS about feeling better from the inside out! If interested I would love to help you! Knowledge is Power! Sign-up for a FREE account & information at https://domesticated.le-vel.com

 
  • DISCLAIMER: This post may contain affiliate links meaning if you click & buy, I may be compensated. So, Thank you!


TACO Seasoning

TACO Seasoning – You make yourself!

I don’t know about all y’all but I never use a complete package of store-bought Taco Seasoning. In my opinion, the flavor just isn’t completely right so typically I’ll use 1/2 package. While I try to save the other portion, it never happens. The rolled up package gets tossed into the trash and wouldn’t you know it, I’ll forget that tidbit just when I need to remember it! Calling all that have been there…

Well no more… No more will I only get 1/2 when I want it all.. LOL

I found (and have since tested) the perfect seasoning mixture for taco meat. It isn’t over powering. It isn’t too spicy and it doesn’t have all of the added extras you find in the pre-packaged version.


SAM_0376

Ingredients:

  • 1/2 tsp Garlic Powder
  • 1/4 tsp Onion Powder
  • 1/2 tsp Oregano, dried
  • 1 tsp Black pepper
  • 1 tbsp Chili Powder
  • 1/2 tsp Paprika
  • 1/4 tsp Red Pepper flakes
  • 1 tsp sea salt
  • 1 1/2 tsp ground Cumin

Mix everything together then add a tablespoon at a time to your Taco meat, taste testing as you go.

I used 2 tablespoons on Taco Salad for the hubs & I which was perfect!

Do you have a spice blend preference for your kitchen? If you are new to the spice world as I was, you may appreciate this beautiful House of Spice – 33pc Ultimate Organic Spice started gift set in a beautiful gift box. A perfect gift for your home cook! Check it out here.

Til Next Time ~

Domesticate Rebellion

THRIVING ~ Have you witnessed the testimonies? It’s not about weight loss; it IS about feeling better from the inside out! If interested I would love to help you! Knowledge is Power! Sign-up for a FREE account & information at https://domesticated.le-vel.com

 
  • DISCLAIMER: This post may contain affiliate links meaning if you click & buy, I may be compensated. So, Thank you!


Brownies from Scratch

Brownies from Scratch

Dudes — the #twofer for Brownies from Scratch recipe is 1st a wonderful fudge type brownie (right out of the oven) OR 2nd let it stand for a moist cake like consistency when left to completely cool. Two results – One recipe! #Score

Anyway you like it ~ Anyway you want it ~ there simply are not any wrong answers here!  😉

This makes one 8×8 pan. Just big enough to satisfy a hungry grand & her Papa; (plus, leaving a few for a grand breakfast the next morning!)

0713182123

Ingredients:

  • 1c sugar
  • 1/2c flour
  • 1/3c cocoa
  • 1/4 tsp salt (See Note)
  • 1/4 tsp baking powder
  • 2 eggs
  • 1/2c vegetable oil
  • 1 tsp Vanilla

Mix everything together thoroughly, ensuring there are no lumps or bumps. Spray an 8×8 pan with PAM or grease with butter. Preheat oven to 350 degrees. Bake for 20 – 25 minutes.

Note : I happen to think these were great just as they were BUT our grand is honing in her palate to which she informed me “there was too much salt”. So, may I suggest a tasting before baking to ensure the salt factor isn’t over powering for your palate!

And seriously, I encourage you to play around with texture & flavor by tossing in some roasted pecans, walnuts, or almonds. Another lovely combo is to swirl in 1/4 c peanut butter or chocolate chips. The options are endless!  0714181010

Brownies from Scratch can be stored (or gifted!) by mixing-up all of the dry ingredients in a Ziploc bag. Be sure to label the outside with wet ingredients, oven temperature and timing. Perfect for a quick late night craving or as an addition to a gift basket for a new mom or college student.

I’m always searching out new recipes and while these are sure to tame the cravings of chocoholics everywhere, I came across them totally by mishap. Y’all know I go to Pinterest for inspiration from other cooks. It was there, I came across a pin for brownies leading me to www.afewshortcuts.com and Amanda who shared a different scratch brownie recipe. However, I quickly realized the pinned shortcut recipe wasn’t the same as the recipe image that caught my eye. And full disclosure; Brownies from Scratch was copied from the image.

I sure wish I knew who to thank for sharing. If you know who curated this lovely gem, won’t you send them my way? Click to be taken to the original pin.

Do you have a young aspiring cook in the family?

Stonewall Kitchen Farmhouse Batter Bowl GiftEncourage their passion with this Stonewall Kitchen Farmhouse Batter Bowl Gift (Click Here) Inspiring breakfast everywhere!


Till Next Time ~

Domesticated Rebellion


Disclaimer: This writing contains affiliate marketing links. Meaning, if you visit, click & buy – I could be compensated. So, Thank You!


Home-made Sloppy Joes

HOME-MADE SLOPPY JOE SANDWICHES

Easy to make, easy to serve and even easier to clean up. #Tripplehitter

Sloppy Joe sandwiches; a perfect simple dinner whipped up in no time when my babygirl & family unexpectedly came to visit for the day. I don’t have to tell y’all moms how awesome it feels to have your adult kiddos want to come over ‘just because’. No hidden agendas, not needing or wanting anything – just the desire to hang out. ♥

My heart ♥loves♥ visits like that!

Thinking of dinner earlier that day, I had already thawed 1-1/2 lbs of ground chuck. And while visiting & watching TV, I randomly started looking for recipes that would stretch enough to feed all of us *without* my having to run to the grocery store.

That’s when Pinterest (♥) showed me a pin “The Best Sloppy Joes”! Something that was a staple for me as a child but not so much for my own kiddos when they were growing up. I can honestly say it’s probably been 15 YEARS (or more) since we’ve had “Sloppy Joes” because my way was to use Manwich Sauce & the hubs was never a fan

0712181757

Until now! This is a winner for dinner at my house. No lie, every one of us had second helpings of this recipe (even my most picky eater!) #winning 🙂

So ~ if you’re looking for a meal that is hearty, easy, inexpensive, made with everyday pantry staples and let me not forget filling – then try this recipe out. Perfect for the next time you need a quick dish to satisfy the hungry mouths around your table!

Ingredients:

  • 1 lb of ground beef/chuck
  • 1 small sweet onion, chopped
  • 1 8 oz can of tomato sauce
  • 1/2 cup ketchup
  • 1 Tbs Brown Sugar
  • 1 tsp ground mustard
  • 1 tsp white vinegar
  • 1 Tbs Worcestershire sauce
  • Salt & Pepper to taste
  • Bread or Buns
  1. Cook your hamburger meat with the onion, then drain, adding it back to your skillet. (I halved my meat as my son in-law is allergic to all things onion!)
  2. Make your sauce by mixing the rest of the ingredients in a small bowl then add to your drained meat; simmering about 10 minutes.
  3. Toast your buns (or not) & top with your favorite condiment, add some cheese (or not), then heap a ladle of the meat mix on your buns, adding to your plate chips, veggies or whatever your flavor and Dig In! (Be sure to have a napkin handy!)

I already know I’ll be making this sooner than the next 15 yrs!

Note: My usual fashion is to provide #twofers; an original recipe that inspires my remake. While I can remake this adding other ingredients such as sweet peppers or garlic, I chose not to because it is incredible just as it is. Thank you Meggan for sharing this recipe! Y’all should check out her other goodies at www.CulinaryHill.com!

Tell me about a favorite of yours to make when company comes over.

Til Next Time,

Domesticated Rebellion

Disclaimer: This particular writing does not contain affiliate links but my page does. Meaning, if you visit, click & buy, I could be compensated. So, Thank You!


Cinnamon Rolls

Cinnamon Rolls ~ Old School Recipe

A single place where good & gooey and sweet & sugary combine together with unforgettable buttery flavor.36254916_10211428705136646_4452179037657235456_n

Impressingly it was pure nostalgia coming from my oven the afternoon I decided to try these on for size. A whiff of reminiscences crepted thru my kitchen to fill every room in the house. Provoking memories of yester-year while inticing current hunger… and, instead of satisfying that hunger with something resembling lunch ~ I waited.  I waited for these beauties to be done. Correction: WE waited.

Um… Dare I testify: don’t do that!” For Realz! This is NOT one of those “do as I do” moments. Otherwise you will accidentally eat them all like we did! (well, almost all) #sugarrush

I’m not sure “how old” equals “old school” either but if you are, let’s say, 30 years or older then you might recall when fresh hand-made cinnamon rolls were actually rolled out by your cafeteria ladies. SAM_0049

They were one of the best things about school.

Of course, this was wwwwaaaayyyyy before we cared about the calorie intake of our student body. When pizza was tasty, sloppy joes were greasy and whole milk was available in white and chocolate! Before the public school lunches were hijacked.

Oh, how I recall wheeling & dealing for any extra cinnamon rolls too. I’d wipe tables, put up trays, stack chairs. #MmmMmmSoGood

My fave way to eat them was to unwind each roll so I could enjoy the soft tender dough, layer by layer. Occasionally, anticipation or lack of remaining lunch time would force me to simply sink deep into the center, combining all of those layers into a single sticky mouthful! Either way, I always tasted the sugary glaze first, followed by nuttiness of pecans ~ a slight sweetness from the dough ~ ending with a buttery, sugary, cinnamonSAM_0051

burst bouncing over my taste buds beginning at the tip of my tongue with each bite.

In my opinion, even the cinnamon rolls sold at the State Fair are not as good as the ones from school ‘back in the day.

So if you’re ready for your taste buds to take a trip down memory lane (or simply want a bomb ass cinnamon roll, head to the pantry with this recipe in hand:

SAM_0052

Dough Ingredients:

  • 2 pkgs. yeast
  • 2 cups warm milk
  • 1/4 cup plus 1 tbsp brown sugar
  • 1 tsp salt (omit if you use salted butter)
  • 2 tbsp softened butter
  • 5 cups all-purpose flour (for softer dough add 1 egg & increase butter to 1/4 cup)

Filling:

  • 3/4 lb butter
  • 1 1/3 cups sugar
  • 1 1/2 cups brown sugar
  • 3 tbsp cinnamon

Glaze:

  • 2 1/4 cups confectioners sugar
  • 1/2 cup warm water
  • 1 tsp vanilla


Dissolve yeast in milk. Add sugar, salt & butter. Mix Well. Add flour gradually mixing well after each addition. Knead and let rise until double in bulk. Heavily butter two 9×13 pans. Lightly oil board (or flour counter) and roll out dough into a 1/4 inch thick rectangle. Spread filling evenly over dough. Roll up tightly, sealing edges. Let rise until double.

Bake in a preheated 350 degree oven for 25 minutes.

Glaze as soon as they come out of the oven.

IMG_20180626_161306_844

I have to credit my cousin for sharing this recipe (Thanks Cuzz!) & http://www.cook.com

Note: I only baked 1/2 of a batch tossing the other 1/2 in the freezer without adding the filling & before the second rise.

The dough freezes well for future cinnamon roll treats! #thereisyourtwofer

Do you have a favorite from past school days? Yeast Rolls were my #2!


Til Next Time ~

Domesticated Rebellion

Disclaimer: This specific writing does not contain affiliate links but my site does. Meaning when you visit ~ if you click & buy, I could be compensated.

So, Thank You!