Strawberry Banana Oatmeal

Strawberry Banana Oatmeal drizzled with Honey

Mmm Mmm Good!

I ♥ when fresh berries are in season! I try to incorporate them into meal time as often as possible. Most folks do this at breakfast but we’re not breakfast people around here. Correction, I’M not a breakfast person. Correction again, I’m not a breakfast ‘morning‘ person. Haha, at least I own it, right?  🙂SAM_0433

Since I’m not a morning breakfast person (coffee, YES please!) I enjoy making sweet but healthy breakfast dishes that ‘fill us up’ without ‘filling us up’ for dinner.

(Catch what I did there? 😉 )

I think oatmeal works exceptionally well, all n all, as it is a perfectly delicious base helping to display your summertime sweet rewards front and center; it’s hearty, healthy and it is a snap to prepare in 10 minuets (or less)!

I used four ingredients:

  • Oatmeal (I used Quaker Quick Oats)
  • 1 thin sliced banana
  • 4-5 strawberries, sliced
  • Honey

Add sliced berries to the center of the oatmeal mound, layering banana slices around outer edge. Next, drizzle honey over all for a light sweet addition to the oats. Definitely a meal deal on evenings when its still topping at a whopping 108 outside!SAM_0437

Whew, help me I’m melting! 🙂

Breakfast can be made as decadent or as savory as you desire. Simply depends on how much time you want to spend in the kitchen. Me, on nights like tonight – Um, no, not so much… Even with air conditioning, once the heat zaps you – you’re just simply zapped. So this chic is gonna re-hydrate, replenish and relax with hubs! ♥

SAM_0436 


Dinner has been served! 


We also included a couple slices of buttered toast along side our bowl of goodness. Add pecans, cranberries, blueberries, bacon 🙂 ~ whatever your hunger craves.

What is your favorite breakfast meal to make for dinner?

Til Next Time ~

Domesticate Rebellion

THRIVING ~ Have you witnessed the testimonies? It’s not about weight loss; it IS about feeling better from the inside out! If interested I would love to help you! Knowledge is Power! Sign-up for a FREE account & information at https://domesticated.le-vel.com

DISCLAIMER: This post may contain affiliate links meaning if you click & buy, I may be compensated. So, Thank you!

Home-made Sloppy Joes

HOME-MADE SLOPPY JOE SANDWICHES

Easy to make, easy to serve and even easier to clean up. #Tripplehitter

Sloppy Joe sandwiches; a perfect simple dinner whipped up in no time when my babygirl & family unexpectedly came to visit for the day. I don’t have to tell y’all moms how awesome it feels to have your adult kiddos want to come over ‘just because’. No hidden agendas, not needing or wanting anything – just the desire to hang out. ♥

My heart ♥loves♥ visits like that!

Thinking of dinner earlier that day, I had already thawed 1-1/2 lbs of ground chuck. And while visiting & watching TV, I randomly started looking for recipes that would stretch enough to feed all of us *without* my having to run to the grocery store.

That’s when Pinterest (♥) showed me a pin “The Best Sloppy Joes”! Something that was a staple for me as a child but not so much for my own kiddos when they were growing up. I can honestly say it’s probably been 15 YEARS (or more) since we’ve had “Sloppy Joes” because my way was to use Manwich Sauce & the hubs was never a fan

0712181757

Until now! This is a winner for dinner at my house. No lie, every one of us had second helpings of this recipe (even my most picky eater!) #winning 🙂

So ~ if you’re looking for a meal that is hearty, easy, inexpensive, made with everyday pantry staples and let me not forget filling – then try this recipe out. Perfect for the next time you need a quick dish to satisfy the hungry mouths around your table!

Ingredients:

  • 1 lb of ground beef/chuck
  • 1 small sweet onion, chopped
  • 1 8 oz can of tomato sauce
  • 1/2 cup ketchup
  • 1 Tbs Brown Sugar
  • 1 tsp ground mustard
  • 1 tsp white vinegar
  • 1 Tbs Worcestershire sauce
  • Salt & Pepper to taste
  • Bread or Buns
  1. Cook your hamburger meat with the onion, then drain, adding it back to your skillet. (I halved my meat as my son in-law is allergic to all things onion!)
  2. Make your sauce by mixing the rest of the ingredients in a small bowl then add to your drained meat; simmering about 10 minutes.
  3. Toast your buns (or not) & top with your favorite condiment, add some cheese (or not), then heap a ladle of the meat mix on your buns, adding to your plate chips, veggies or whatever your flavor and Dig In! (Be sure to have a napkin handy!)

I already know I’ll be making this sooner than the next 15 yrs!

Note: My usual fashion is to provide #twofers; an original recipe that inspires my remake. While I can remake this adding other ingredients such as sweet peppers or garlic, I chose not to because it is incredible just as it is. Thank you Meggan for sharing this recipe! Y’all should check out her other goodies at www.CulinaryHill.com!

Tell me about a favorite of yours to make when company comes over.

Til Next Time,

Domesticated Rebellion

Disclaimer: This particular writing does not contain affiliate links but my page does. Meaning, if you visit, click & buy, I could be compensated. So, Thank You!


Rustic Pizza Dough

One of my all time favorite things to eat is and always will be PIZZA! Rather from scratch at home or dropping in at one of the popular pizza joints that are popping up everywhere – it is one of the ultimate satisfying ‘fast food’ ‘finger food’ options I just can’t say no to.

When I was younger I enjoyed thick crust pizza ‘pie’. Something you sank your teeth into but could still hold with your hands; (occasionally requiring a fork.) However, taste-buds, husbands and kids bring about expansion… In this instance, expanding my tastes and ultimately my hips therefore thin crust became a fave. 😉

Specifically we enjoy a crust so thin it has rips and tears from being stretched! It has burnt edges with bubbles filled with air that crunch noisily when bitten into.

Mmmm, do you see that? That crunch? Paper thin and so so good. Even though I know we eat initially with our eyes – let me assure you the taste is even better!

Previously I found a nice enough “10 minute” dough recipe; Fast & easy but it had a ‘chew’ versus a ‘crunchy bite’. So where do I go for inspiration? 

-to pinterest ♥ and the net-

Where I found the perfect Rustic Pizza Dough that if you have time to wait on its rise, you will absolutely fall in love with the authenticity!

Let this transport you to the outside patios of Italy. I’ve made it as far as my porch.

Perhaps you’ll make it to Italy for me! LOL

Typically, when we have pizza night at our house, it’s usually hand in hand with having a few grands over. I recall pizza dough being the first thing we attempted to make with our first grand little. Something ‘hands on’ allowing lil fingers to play, all while being in the midst of what was happening in the typical hub of the home; AKA the kitchen!

I personally do Mise en place (French pronunciation: ​[mi zɑ̃ ˈplas]) which is a French culinary phrase meaning “putting in place” or “everything in its place.” I gather everything up that I will need before starting, including the various toppings that will be used. I pre-cook most toppings too since the time in the oven isn’t really long enough to accommodate. Of course, this is entirely personal preference – so feel free to rock out your own. That’s exactly what I do!

Crust Ingredients:

  • 5 cups AP flour (approx) + some for dusting
  • 1 1/2 tsp active dry yeast
  • 1 1/2 tsp kosher salt (original calls for sea salt)
  • 2 1/4 cups COLD water (yup, COLD)
  • 1 tbsp EVOO

While gathering the ingredients, that is a good time to start pre-heating your oven to a min of 500 degrees. The original recipe and my own experience concur a pizza stone makes all the difference too. Be sure to have yours in the oven during the preheat process.

I used a kitchen aide mixer but not to fret, this can come together by hand nicely too. So use what you have – it’s really hard to fudge this one guys! 🙂 Incorporate all dry ingredients together then add COLD water. TaDah!

No proofing necessary! (That’s a win win in my book!)

Mix, adding additional flour as needed. The dough should be slightly sticky but not enough to remain on the side walls of your mixer. It’ll take between 8-12 minutes to combine. When finished, remove the dough and cut into 6 rounds. Don’t worry about extras — this recipe freezes exceptionally well!

Place the rounds on a cookie sheet, drizzle with the EVOO, cover with plastic wrap or a damp cloth and walk away. Not really ‘away’ but let it rest for an hour or so in a nice warm spot. The yeast will activate surprisingly well, doubling the size of each round. This time allowance gives ample opportunity to pre-cook your toppings if your into that kind of thing.

Once the dough has risen, take out one of the rounds to work while keeping the others covered. This will ensure they do not dry out. Use a slight dusting of flour on your counter to roll out your dough the size of your pizza peel. *Dust your peel so your dough will slip off onto the stone without sticking.

Pre-bake each crust at high temp for 1-2 minutes to ensure a crisp crunchy texture before adding any toppings. It is seriously worth the minimal effort! Remove the pre-baked crust from the oven. Keep in mind Less is More if you desire crisp & crunchy! Use your favorite sauce, prepared toppings & choice of cheese then back into the oven between 5-7 minutes.

Bam! Dinner Is Served!

What is your favorite pizza? Do you prefer thin crust or thick crust? Did you know pizza is a fabulous way to use left over meats, veggies and the last tidbit of various cheeses? Is there a special recipe you do with your littles or grands? Let me know how it goes in your kitchen!

Til next time ~

Domesticated Rebellion

Shout out to Ciao Florentina for the original recipe posted in 2011 at https://ciaoflorentina.com/about-florentina/ who shares her journal of simple living, filled with joy, laughter and sinfully delicious recipes!

Disclaimer: This post contains no affiliate links but my site does. Meaning if you click & buy, I could be compensated. So, Thank you!


Italian Meatballs in 30 minutes

ITALIAN MEATBALLS IN 30 MINUTES

How would you like to find a recipe that is super delicious, inexpensive, ready to eat in 30 minutes PLUS freezes well? I just so happened to stumble across such a recipe, so I did what I do best tweaking it slightly with the items I had on hand & dinner was served! I’m learning it’s okay to mix it up. Switching out different meats with different fat content to obtain different texture and flavor. I’m finding my own ‘palette’ while also discovering tried and true classics. For example, I added bacon to this recipe as the ground beef I had was ‘extra’ lean. This helped in the juicy department. BONUS: the bacon also provided a nice rich smokey depth. I love finding & sharing simple easy satisfying dishes and this my friends, scored a 10! I hope you enjoy.

#WinnerWinnerMeatballDinner folks! 🙂

You will need the following:

  • 1.5 lbs extra lean ground beef
  • 3/4 c bread crumbs (I used plain home-made)
  • 1/4 small sweet onion, finely chopped/minced
  • 3 garlic cloves, minced
  • 4 strips bacon, chop
  • 1 lg egg
  • 2 T tomato sauce
  • 1 1/2 T Italian Seasoning
  • Salt /Pepper (to taste)
  • 1/4 t red pepper flakes (totally optional, but very good)

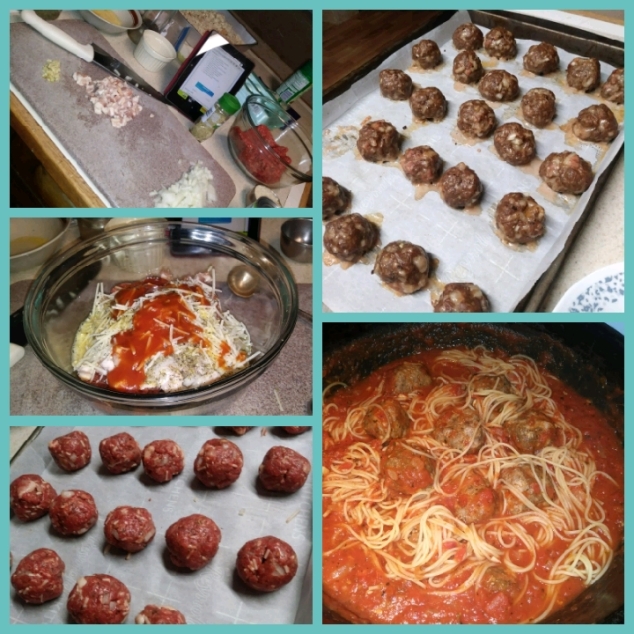
Preheat your oven to 375 degrees. Mix everything in a single bowl until well combined. I used a 2 oz  scoop (bite size) for equal size meatballs placing them on a sheet pan lined with parchment paper. Bake between 20 – 30 minutes depending on your oven. A single batch makes twenty meatballs.

5801

With it being just the two of us I get two meals out of each batch. Angel hair pasta w/ homemade sauce was tossed together in a hurry tonight but I’m really looking forward to meatball subs tomorrow. #leftovers #twofer

On Pinterest I found a pin leading me to The Slow Roasted Italian where I read their recipe for Italian Herb Baked Meatballs thus inspiring me to make my own. Visit Donna & Chad for some lighthearted love inspired recipes including other meatball variations. 

Do you have a favorite meatball recipe? A secret ingredient? Perhaps a memory of helping mom or grandma in the kitchen? That is one of my goals. Creating memories in the kitchen with my grands ♥ Savoring moments one bite at a time ♥

Til Next Time ~ Be Blessed

Domesticated Rebellion


Roasted Tomatoes

IT’S OFFICIALLY SPRING Y’ALL!

I know its been a minute since I last posted but see, we have these lil peoples that sometimes like to visit ‘the farm’. Not our littles but ‘Grand Littles‘… Hmm, catchy… Remember you heard it here 1st if it becomes a thing.  🙂  So, we’ve had a few of our grands out sporadically over the past couple of weeks. Assisting this Mimi in getting into the Spring of things… We cooked, we gardened, we explored & hunted, and we painted rocks. We had lazy mornings, some cReAtiVe afternoons, and fun evenings ending late into the night. But alas, giggles, grins, and all things ‘grand’ come to an end as they go back home returning to friends, school and routine ~ leaving the hubs and I to return to our less structured but nonetheless routine as well.

*sigh*

I’m sure some of you can relate that after a couple of weeks of consuming more than our fair share of pizza, mac & cheese, waffles with whipped cream, chili dogs, chicken nuggets and s’mores 260(and more) my body is demanding what it has been lacking: Some healthy! Yes, we ARE those kind of Mimi/Papa’s and Yes, I seriously feel like a Weeble

“🎼Weebles wobble ♪ but ♪ we don’t fall down ♪.”   

Perusing the isles of the market the other day we spotted some beautiful plump hot-house tomatoes & I just had to have them. They screamed to me: “SPRING IS HERE”.  I was hoping to find some inspiration for a light yet filling dinner & here it was.  Now, I’m not a science guru so don’t get all nerdy on me because I’m not 100% sure just how ‘healthy’ tomatoes are. However, what I do know is we love them and they are not full of sugar or carbs. So in my book – that’s healthy enough for tonight! I’ll consult Google on the matter later tho. 😉

We made it home with our purchases in hand and a grumble in our stomach. It didn’t take long to prep & pop these babies in the oven. Easy Peasy folks!

Imagine if you can… 250

Tomatoes roasting, sizzling in EVOO, complete with garlic, basil, rosemary, thyme and oregano… Scrumptious bits bursting with flavor in each mouth-watering bite! Just enough tang to get your jaw to slightly clinch initiating your saliva glands into some double duty action. AhHaha Yes, you DO know! 🙂

However, no one eats just tomatoes for dinner! Although fresh fruits serve as a delightful snack the hubs requires a bit more substance in his meal so these beauties were paired with some polenta to complete our light but yet filling dinner!

18953912cdaa467b255f9ef0b44cf4f6Polenta is a dish that originated in Italy. It is a dish of boiled cornmeal that was historically made from other grains. It may be served as a hot porridge/cereal, or it may be allowed to cool and solidify into a loaf that can be baked, fried, or grilled.  I always use the brand Bob Mills. Food for Thought: I originally believed polenta & grits were the same. They are not. Polenta is yellow corn while grits are white corn, specifically hominy. (Ah ha, that explains my dislike of grits!)

To make this preheat oven to 425 degrees and gather up:

  • 4-5 ripe tomatoes, slice & lay out on a sheet pan lined with foil/parchment or a Silpat 
  • 2-3 Tbs EVOO to drizzle over all
  • 1-2 cloves of garlic, minced & sprinkled evenly over each slice
  • Mix together 1 tsp each: Rosemary, Thyme, Oregano and Basil (or use 1 1/2 Tbs Italian herb mixture) and sprinkle over each tomato slice
  • Salt & pepper to liking

Roast tomatoes for 30-45 minutes. Plenty of time to prepare the polenta your favorite way and shred some parmesan cheese. MMMmmm, Our belly’s said “Thank you”!  Do you like roasted tomatoes? Let me know what you would pair with them.

Note to Self: One thing for sure, Grands remind me that I am not as young as I once was but I am as young as I ever will be again!

Til Next Time,

Domesticated Rebellion

THRIVING ~ Have you witnessed the testimonies? It’s not about weight loss; it IS about feeling better from the inside out! If interested I would love to help you! Sign-up for a free account at https://domesticated.le-vel.com

 
  • DISCLAIMER: This post may contain affiliate links meaning if you click & buy, I may be compensated. So, Thank you!


Green Chili Chicken Enchilada Soup

Green Chili Chicken Enchilada Soup

Spicy, belly warming comfort in a big bowl on a cool day with the hubs ~ does it get any better than that? For me at the moment, nope

I do all I can to savor the sweetness of a quiet peaceful ‘nothing pressing to do’ afternoon like today. No agenda. No appointments. Just the big screen, my coffee, blanket and the boys at my feet (of the four-legged kind ;)) Easy-going dreary day enabling my drifting back and forth between dozing off & watching the final season of Heartland… or NASCAR… or… ZZzz…

Peaceful slumber came easily until I hear:

“Honey, What’s for dinner?”

Heart-racing with bubbling panic momentarily overtake a sleepy-eyed me. Sheesh, How long was I out? What time is it? Then the moment passes because I see the hubs is sleepy-eyed  too; just like me. 

♥ Stretch *sigh* Yawn  ♥ 

No worries. I didn’t nap past dinner time BUT I did wake up unbelievably hungry!  So, y’all know I ♥ Pinterest. And that is exactly where I found some last-minute inspiration when I was vapor locked for dinner ideas. Say Hello to Chelsea & her Crockpot Green Chicken Chili Enchilada Soup  ( ❤ ). Her idea went hand in hand with items I already had so I’d say it was destiny for dinner!

006

Here’s what I grabbed:

  • 1 Lg can (28 ounces) green enchilada sauce
  • 1 can white beans, drained
  • 1 can black beans, drained & rinsed
  • 3 boneless chicken breast (I used leftover grilled breast & shredded it)
  • 1 sweet onion, chopped & sautéed in 1 tablespoon EVOO
  • 4 teaspoons chili powder
  • 1 tablespoon ground cumin
  • 3/4 teaspoon smoked paprika
  • 1 teaspoon salt
  • 1/4 teaspoon pepper
  • 2-3 tablespoons fresh cilantro optional
  • 2 cups chicken broth or stock 
  • 2 tablespoon sour cream (topping)
  • Monterrey or Colby Jack Cheese (shredded)
  • Chopped avocado 
  • 1/4 cup sugar (*optional)

009

Personally, I enjoy dancing around the kitchen doing some sort of ‘prep’ work for dinner. This dish however had minimal effort in the prep department. A good thing on this particular day.  For this soup, prep consisted of just chopping/sauteing the onion then peeling/cutting up the avocado and finally shredding the already cooked chicken breast. Easy Peasy friends. The rest is open, drain, rinse, or measure and dump into a soup pot. Warm until bubbly & dish it up. TADAH! We topped each of ours with sour cream, shredded cheeses and chopped avocado.

Full Disclosure moment… ready for a laugh y’all? IMO, this is a very spicy soup. I honestly did not realize how spicy it *would have been if not for this slight mishap that could have proved disastrous. See, while warming the soup I started heating water for some green tea. (the hubs ♥ green tea)

005

Anyway, apparently I was side tracked (or sleep walking) as instead of adding sugar to the boiling water for the tea… you see it coming, huh?  yup, yup ~ you guessed it ~ I lifted the  soup pot lid  with one hand & poured 1/4 cup of sugar in with my other! F$!% F$!% F$!% FF$$!!%%  Immediately I knew what I had done and there was absolutely no way to undo it. In my mind I mock myself by replaying this in slow-mo.  SMH! To say I was pissed-off was an understatement. #JustCallMeGrace

*Long story short & some real disclosure – the sugar actually toned down the spice enough for me to enjoy. I’m not a spicy person, I don’t enjoy burning from the inside out. Hmmm; destiny meets divine intervention? Perhaps. I’m just thankful tho as it turned out really good, froze well and we have enjoyed it three additional times since.

Have you had a recipe mishap that ended up making something BETTER? Tell me about it!

Til Next Time ~

Domesticated Rebellion


THRIVING , Have you witnessed the testimonies? It’s not about weight loss; it IS about feeling better from the inside out! If interested I would love to help you! Sign-up for a free account at https://domesticated.le-vel.com

 
  • DISCLAIMER: This post may contain affiliate links meaning if you click & buy, I may be compensated. So, Thank you!


Gooey Cheesesteak Sandwiches

GOOEY CHEESESTEAK SANDWICHES

While I’ve never been to Philly… I have been to Arby’s… HahahaHuH?

Say What?

Follow me for a second while I connect the dots. I’m writing about whats near and dear to my heart. Bad for you in a good way.  You know it.. None other than the beloved cheesy greasy meaty mouthful sandwich commonly referred to as a Cheesesteak!

See, while cruising along the recent pins of Pinterest (♥) I was directed to The Little Kitchen and this inspirational cheesesteak gem!

 1209171852

This caused me to kinda do a ‘bad’Michael Jackson moon walk around my tiny kitchen island while holding up my kindle fire… Yup…. that was me. I’m not ashamed.     

Cheesesteaks was written by Julie Deily who provides two varieties. One with peppers. One with mushrooms. Both with onions. Personally, we prefer the meat mixed with sweet onions and topped with cheese. Peppers, specifically green peppers, have been known to create alottle (a lot/a little) heartburn or gas.

And frankly, heartburn or gas can jack up anything becoming a repeat at my house!

Although the recipe peaks with ribeye, I chose a thinly sliced bottom chuck round & seared the chunks over high heat in my cast iron skillet with butter. I use my cast iron cook set for practically everything from the stove top to the oven, even the grill!  (I♥Mom!)

1209171856

So, If you follow me then you know I’m all about using what is on hand & not trexing to the store for every single ingredient of a new recipe. Thus bottom chuck round… Trust me, it’s still a keeper! After removing the seared meat repeat the process with the rest of your ingredients. Get real with it!

Sweet onions, mushrooms & peppers. Oh My!

Once cooked, combine everything together in your cast iron skillet and top with provolone keeping low heat until melted.

Note: While you are searing your meat or cooking your mushrooms, onion n pepper toppings, preheat your oven to 300 or so and get your bread ready. Open your hoagie buns and slather your preferred aoli, mayo, cheesewhiz??? Place bread on individual sheets of aluminium foil and when ready, transfer the goods out of the skillet making sure to Smoosh the goods deep into one side of the soft bread before closing.

1209171919b

Seriously, You want this to be FULL of the juicy goodness encased in melted cheese. The next step gives you gooey goodness. 🙂

Tightly wrap each sandwich placing on a sheet pan. Bake these bad boys 20 minutes or so and be prepared to talk out loud as they are DELISH!

MMMmmmMMM #Goodtimes #Goodeats

I’m sorry Arby’s, Really. It’s not you. It’s me. (Until we meet again of course – you know how much I 💖 your curly fries!)

Til Next Time~

Domesticated Rebellion

THRIVING , It’s not about weight loss; it’s about feeling better from the inside out!  I can help! https://domesticated.le-vel.com

  • DISCLAIMER: This post contains affiliate links meaning if you click & buy, I may be compensated. So, Thank you!


Feel Good Veggie Soup

Hey World ~ do you know what…? I missed Valentines! I mean the ‘day’ came alright but we didn’t celebrate…  😦  Seems our lil home front is being attacked by the yuk bug & its been that way All Year Long! First it was me, next the hubs, then both of us. Following in our footsteps was our black lab (that was an adventure!), then Yay its me ~ and now both of us! AGAIN!

Geez, I am so over this already!

Luckily, I have a hubs who takes awesome care of me when I’m down & out. He’s pretty incredible on that front – but – when we’re both down…

LOL, let’s just say it can be challenging! Hahaha; #realtalk.

Considering we’re both ‘under the weather’ + I might be kinda on the cranky side with zero drive to do anything ~ I’d say it’s a ‘good ol vegetable soup to the rescue kind of day’! 080

A beautiful blast of vitamins, minerals and nutrients in a single pot to revive the soul & internal body!

And ya know what else? 4 steps folks! Easy Peasy! Just the way I like it!

Peel, Clean, Chop, Simmer & Viola! 

Fix & Forget so you can rest kinda dinner!

Fingers crossed ~ hoping to overload our immune systems & kick whateverthehell we got to the curb!

On the flip side, I truly could not have planned for a better day considering it is 22 degrees outside. Perfect for staying bundled up inside with a hot steamy bowl of love that is sure to kick some butt on the germ front!

I know you’ve been there; I can feel your heads nodding in understanding.  🙂

This veggie soup is also known as a ‘fat flushing’ soup. It’s packed with a powerhouse of vegetables that provide a multitude of benefits. My #twofers are simple, not scientific but they work for me, haha. 1) It’s not heavy; meaning I can eat all I want with zero guilt 2) Not only does it smell wonderful, it really tastes amazing. What a concept! Taste good and good for you! #score! Check out the original recipe over at SkinnyMs.com or by clicking HERE. (such a fabulous site!)

081

Truthfact: Before today, I had NEVER had zucchini in a soup. I always thought it would be slimey. I am happily surprised that it is not!

Mix & match what you have on hand to make this your own.  If you prefer something heartier simply add some sausage or shredded rotisserie chicken for a complete stick to your ribs ~yuk~ fighting soup! I’m certain if you’re a veggie eater you’ll enjoy this medley!

Gather up:

  • 4 cups chicken broth (read up on the benefits of bone broth here)
  • 1 medium sweet potato peeled and cut into 1″ cubes
  • 1 diced sweet onion
  • 1-2 cloves minced garlic
  • 1 zucchini sliced
  • 1 celery stalk chopped
  • 3 carrots peeled and sliced
  • 1 tsp sea salt
  • 1 tsp fresh cracked pepper
  • 1/8 tsp ground allspice
  • 1 tsp smoked paprika
  • 1 bay leaf
  • 1 can navy beans, drained
  • 1 can black beans, drained and rinsed
  • 1 can diced tomatoes
  • 1 tablespoon EVOO (reserve for serving; 1/2 tsp pp)

Add everything to your pot except EVOO. Cover & simmer on your cook top for 1 to 1-1/2 hours or until the vegetables are fork tender. I served this with home-made bread083

A truly satisfying and gratifying feel good dinner that was a snap to put together, helped me get in the grub mood while it cooked ~ all while getting some much needed rest!

Plus, we all know there is nothing better than being warmed from the inside out when we feel ~yuk~!

I feel better already!

Til next time ~

Domesticated Rebellion

Butternut Squash Soup – Roasted Style

Let me preface this post with some full disclosure friends: I HEART FRESH VEGGIES! Although I am not a vegetarian ~ I am a huge fan of all plant-based edibles! 😉 LOL

Veggies are my saving grace from food boredom.  I love how they are so forgiving & provide me some versatility in how I cook them. Rather the fry pan, baked in the oven or perhaps some steaming. Maybe grilling on an open flame, even the crock pot or saute — However you prefer vegetables — to me, in a word, they ROCK! As does this recipe…

Simple. Easy. And the word that will either scare you away or pull you in….. HEALTHY! A melt in your mouth good kind of healthy!

008

PSA bonus: This soup is extra healthy (IMO) as there is zero cream and zero butter. If I didn’t make it myself, I wouldn’t know it lacked either of these ingredients because it is exceptionally silky smooth. The natural flavors meld together seamlessly to create a sweet but earthy deepness. A taste bud trip that can only be taken on the roasting road. *YUM* Isn’t it amazing the different textures/tastes each cooking method brings out of each type of vegetable? I could go on and on about my discoveries but I’ll save those explorations for another post.  Moving on… To make this beautiful soup, you simply put all your vegetables together in a roasting pan. The flavors combine while roasting, meaning your oven does the heavy lifting for you.  Another #SCORE!


I roasted together:

  • 1 butternut squash, peeled and diced into 1′ sections
  • 1 large sweet onion chopped into large chunks
  • 3 large carrots peeled and chopped
  • Thyme & Rosemary to taste (can use either fresh or dried – don’t forget to remove any stems before puree if you use fresh herbs)
  • Salt & Pepper to taste
  • Dash of Hot Sauce (Texas Pete)
  • 3 cloves diced garlic (distributed evenly)
  • 3 cups vegetable broth – 1/2c to 1c for puree use the rest for final soup coupling
  • 2 TSP EVOO

Peel, cut and clean all of your vegetables. Combine everything together with oil and spices in your roasting pan then roast in the oven at 400′ until everything is fork tender. (Personally, I let it all go until the edges began to burn & each morsel glistened with droplets of natural juices making way to the surface.) Ah Yes, slightly crispy outside with tender fluffy insides. Once cooked as desired, remove from oven and put into a food processor pulsing with just enough vegetable broth until smooth and silky. Once all of your vegetables are pureed, add them to a sauce pan with the remaining broth. Simmer for about 10 minutes tasting and add more seasoning if needed, stir to combine and Enjoy! It really is that easy!

I only tweaked this recipe slightly. And that was by omission of any product called for that I didn’t have on hand; specifically sage leaves, celery and red pepper. No matter though, I can tell you it was scrumptious. No guilt. Very Filling. And Very Good For you! I hope you try it. If you look closely, you’ll see I did add cream in a moment of weakness. Don’t judge! 🙂

As always, hit me up and let me know what you think! If you switch it up, do share!

Til next time ~

Domesticated Rebellion

To see the original recipe visit www.aheadofthyme.com or click HERE.

  • DISCLAIMER: This post contains affiliate links meaning if you click & buy, I may be compensated. Thank you!


Bye Bye Bye Cheater Sauce

Simple Easy Meat sauce 

To say I was fashionably late in finding my passion for food is an understatement. I think if Pinterest would have been around back in my day I would have been a more rounded momma… (For real, I have chubby cheeks on both sides now proving this so! *smile*)

My passion thing just sorta happened. I guess the saying ‘you eat with your eyes first’ really is true! And it’s really odd how this happened as well. I wasn’t new to Pinterest anymore but I had used it primarily for various DIY projects; not cooking. Cooking was an interruption. A chore. Then I saw a homemade French bread recipe on a day I was hoping to create some extra spark with the hubs after his long day. (it worked, btw!)

Some history for ya… When my littles were little, one of them informed me my spaghetti was made with cheater sauce. Hmmm, cheater sauce… really now… Hmph, the lil brat  was right & I was okay with that until I found the french bread recipe. In my mind, if I was going to make bread, then I needed to make my sauce too! (Remember mission was SPARKS..) xoxo

So, after reading more sauce recipes than I could remember, I decided to simply try & wing it on my own. Using what I had in the pantry the following was created:

  • Lg Can of crushed tomatoes, (Have since tried whole peeled tomatoes in the processor which provided a more in-depth tomato flavor)
  • 1 Tbls Italian seasonings, (I have been known to use fresh basil & oregano alone and/or combined but the blend has a few additional herbs that I don’t grow.)
  • 1 lb Hamburger meat brown and drained, (I have also blended hamburger with italian sausage or just used sausage.)
  • 3 Tbls garlic,
  • 1/2 sweet onion (diced),
  • salt & pepper to taste
  • 2 Tbls EVOO (Extra Virgin Olive Oil)
  • can of sliced mushrooms, drained

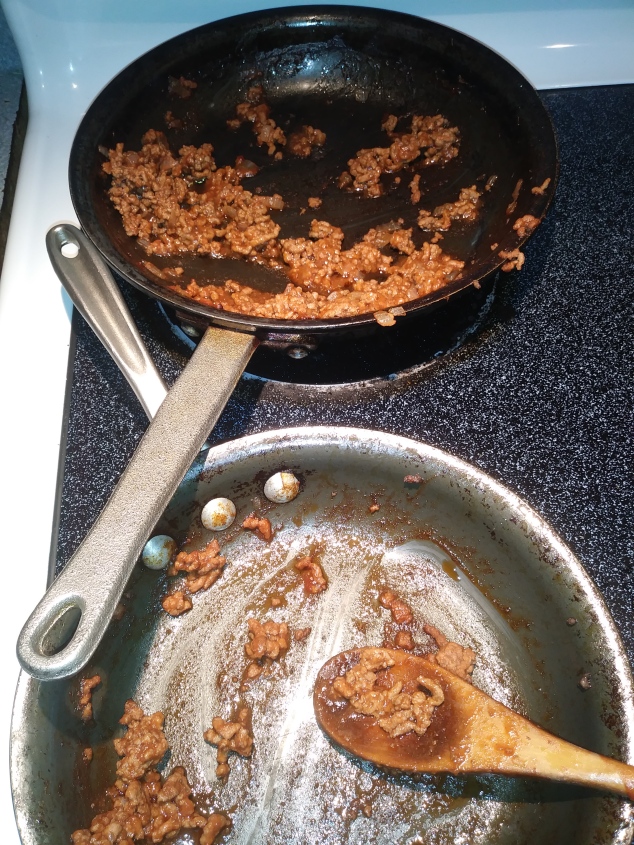
I browned my hamburger meat, drained off the fat and removed. Heat up the EVOO until it’s shimmering then added the onion and cooked until translucent. Add garlic, stir it in just until you smell a toasty aroma. Stir in herbs & canned tomatoes, mix and let simmer for 10 minutes before adding meat, mushrooms and salt/pepper. NOTE: it’s gonna splatter! I recommend a splatter guard or lid to deflect the lil drops of sauce, definitely.

3721[1]I let it simmer for about 30 minutes after adding the meat just so the flavors blend. Cook your pasta of choice  per directions (we prefer Angel Hair) & top with this divine meat sauce followed up with some grated Parmesan!

1512089476251[1]1512101305313[1]

I was very pleased with myself, the results, and the reception received from the hubs was the final seal of approval! XoXo

But, back to this versatile & very easy sauce… This can be tweaked as needed for your personal taste buds! Easily incorporate spice mixtures or meat variations as you deem worthy… This is just a basic go to. It can be dressed up or dressed down to pair with any pasta.

I’m sure most of you already have a trusted go-to. I just wanted to share mine as I’ve finally said Bye Bye Bye to ‘cheater sauce’ (aka spaghetti sauce in a can or jar)! BTW, there is nothing wrong with cheater sauce; my brat loved it but also loves to poke the bear!  😉

Do you have a favorite sauce? A favorite dish? Let me know, I’m always looking for inspiration from other home cooks!

Til Next Time~

Domesticated Rebellion